Easy DIY Paving Tips
You might pass through a spot in your house and constantly mumble about it needing a make-over. Perhaps, a patch of muddy ground outside your garden shed needs some work. Or, every time it rains, you always get reminded the driveway needs fixing, otherwise, rainwater will keep accumulating on your driveway’s surface.
Once you do commit to finally creating the solution, it’s easy to get overwhelmed by all the seemingly endless things that need to be done. But, like everything else, if you come into it proper planning, it will always come through better in the end. All you need are DIY paving tips.
If you’re planning to go the DIY route, this is the perfect resource for you. We’ve created straightforward tips you can just tick off your to-do list.
Planning for the Project
- Ensure you order everything you need at once.
- Set aside an allowance for breakages and cutting.
- Once you’ve planned your paving area, research on the different paver sizes for the particular paver you have chosen. This will give you an estimate of how many pavers you will require.
- If you are planning to lay pavers in a pattern, decide the pattern beforehand, too. So you won’t have to invest in extra pavers nor face the risk of running out of pavers.
- If you are paving right next to your house, use a plastic membrane against the concrete foundation that has been exposed.
Preparing The Base
- Always use coarse washed river sand or similar bedding sand for paving projects.
- Use stakes to mark corners of the area to be paved. Run a string line between them. The level of the string should be the level at which you want your paving to be. You can use a spirit level to check the level.
- Do not keep the surface on a single level. You need to give a small slope for the water to run off. Be careful while setting the direction of the slope as the slope should be away from your property. Remember, there is no such thing as too much drainage!
- Invest in a drain at the low point of the slope so that water does not accumulate between pavers. If you allow water to remain between pavers, it can reduce stability and also bring efflorescence.
- When laying up a hill, start at the bottom and sand in as you go. This will help avoid lines shifting with gravity.
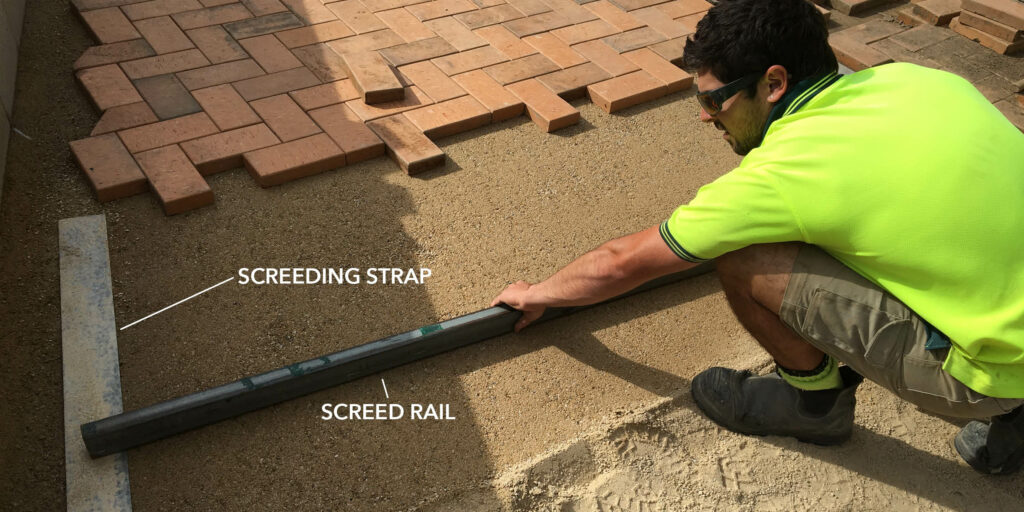
- The steel strap & screed method of preparing sand for laying is most effective.
- To prevent washing out of the bed sand, restrain the edges of the paving. Opt for reinforced concrete or mortar restraints for strong bonding frame.
- Compact sand, not the paver. This applies to all non-commercial paving.
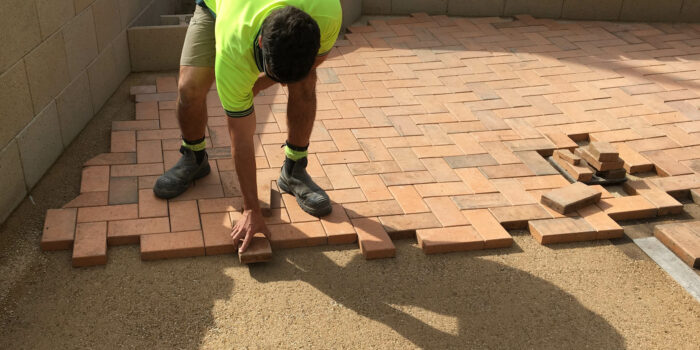
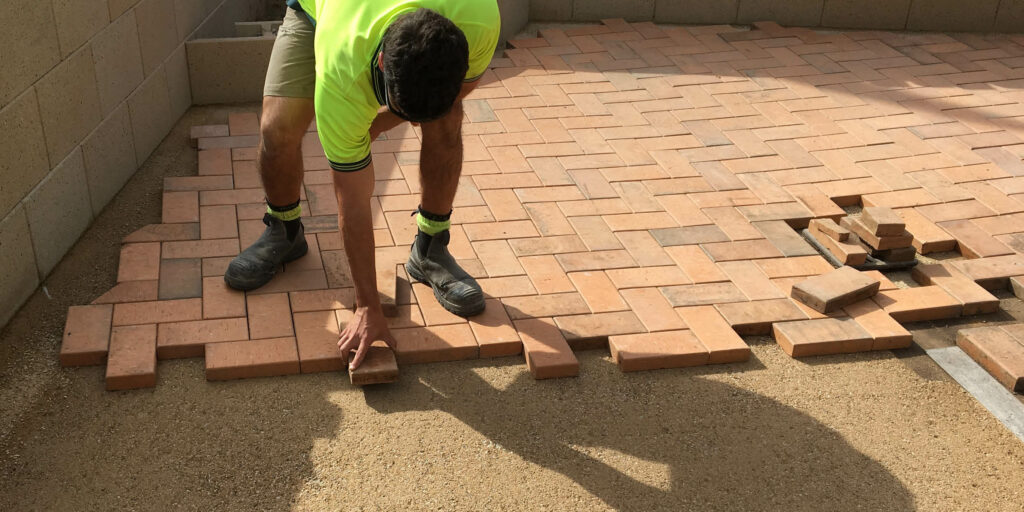
Laying the Pavers
- Ensure you lay the grain running the same way.
- Work off as many pallets as possible (three or more). This will allow you to evenly blend the product.
- For best results, choose pavers down the sides of your pallets (not across) randomly. This will give a more even blending.
- Have all half-cuts or full pavers at doorways and focal points when setting out your paving. Imagine the finished pavement!
Did these DIY paving tips help motivate you to get started on your first paving project? Visit us today so we can give you some personal tips!
shop our range of paving products here-

Visit us at APC to pick up a free sample!
Or, send us a product enquiry or request a quote online